From Zero to GPU: Creating a dstack Backend for CloudRift
Introduction
If you’ve ever wished you could plug your own GPU infrastructure into dstack instead of relying on the default cloud providers, you’re not alone. In this post, I’ll show you exactly how I integrated CloudRift — a GPU-as-a-service platform — as a custom backend for dstack, letting me spin up powerful GPU environments using my own provisioning logic. Whether you’re working with on-premise machines, a niche provider, or just love tinkering with infrastructure, this guide will walk you through the whole process: from backend definition to running your first ML job on CloudRift.
What is dstack?
dstack is an open-source tool designed to simplify the deployment and management of workloads across different compute environments. It allows you to run scripts, notebooks, or containers on scalable remote infrastructure — whether on the cloud, on-premise, or custom servers — without dealing directly with the complexities of provisioning or orchestration.
Unlike heavier orchestration platforms like Kubernetes, dstack focuses on developer simplicity:
-
Minimal Setup: You describe your workload and environment declaratively, and dstack handles the rest.
-
Portable Workloads: Run jobs on various backends (AWS, Azure, or custom) without changing your code.
-
Built for ML and Data Science: Out-of-the-box support for Jupyter, Docker, Python scripts, and ML pipelines.
-
Flexible Backend System: Define your own backend to run workloads on infrastructure you control.
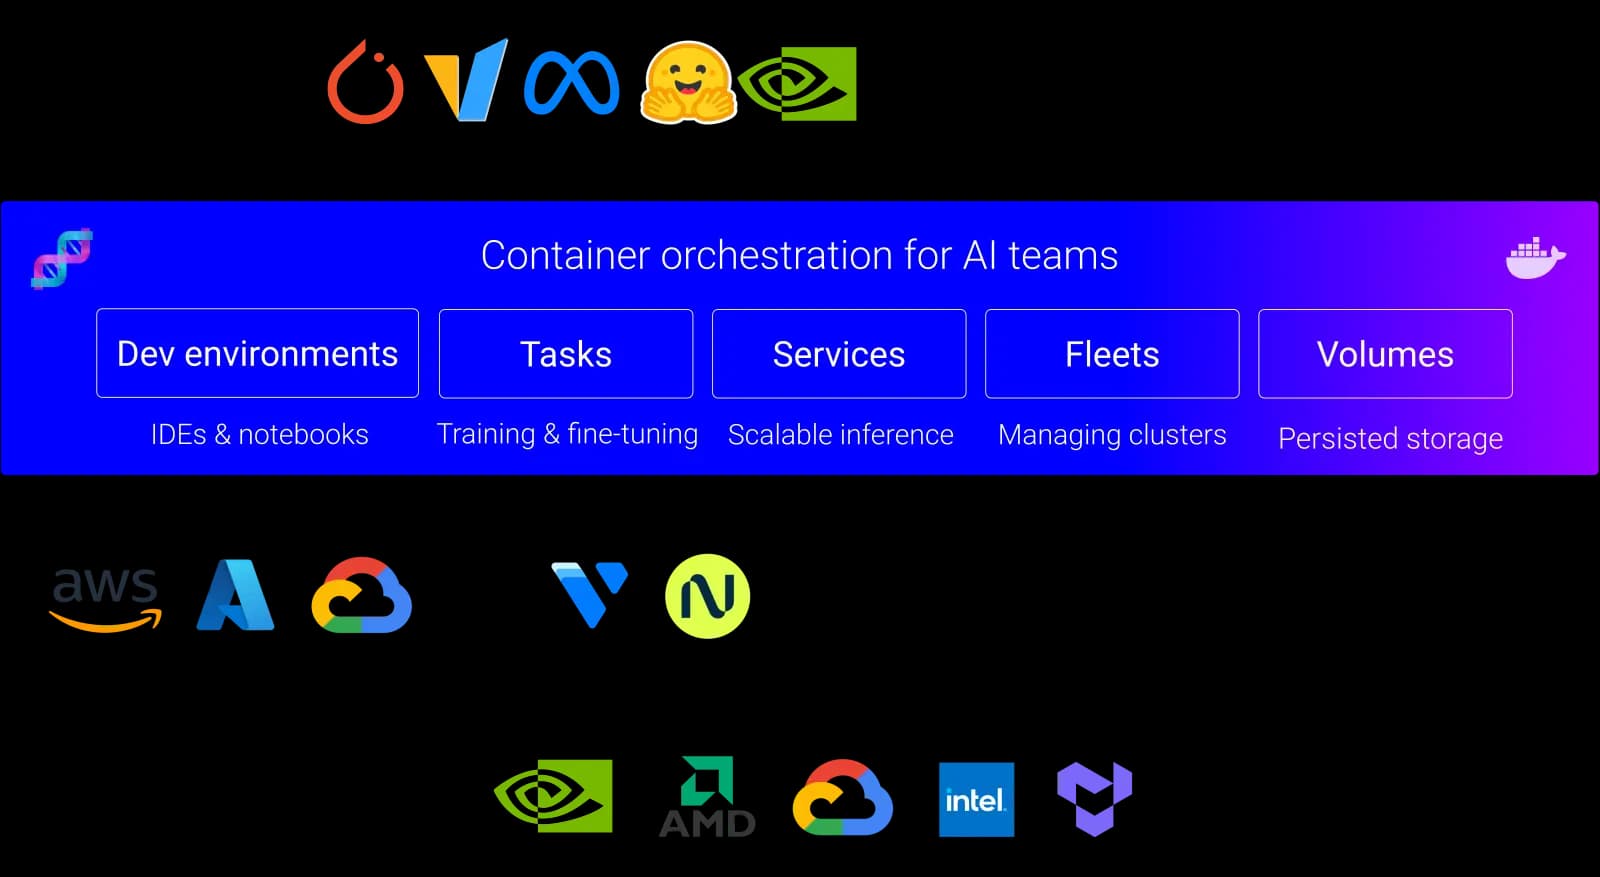
Since a picture is worth a thousand words, the diagram below illustrates how dstack acts as a layer between your workloads and cloud infrastructure:
Why Use a Custom Backend?
dstack comes with support for several cloud providers out-of-the-box, but its flexible architecture allows you to define your own backend. This is valuable when:
-
You use niche providers
-
You manage on-premise hardware or private clouds.
-
You need full control over provisioning logic.
Getting Started
Before diving in, make sure you have:
- A working installation of dstack CLI or cloned repository in case of adding a new backend
- API access or CLI access to CloudRift.
- Basic familiarity with Python or YAML (depending on how you'll define the backend).
- Some simple ML or CUDA workload to test with.
When working with dstack repository https://github.com/dstackai/dstack you need to read DEVELOPMENT.md and setup python environment using uv:
# install uv
curl -LsSf https://astral.sh/uv/install.sh | sh
# sync all extras and dependencies
uv sync --all-extras
# optional tools to check formatting etc
uv run pre-commit install
dstack has also neat UI where you can manage your workflows and fleets. You have to build it first (it’s described in FRONTEND.md):
cd frontend
npm install
npm run build
cp -r build/ ../src/dstack/_internal/server/statics/
cd ..
You may also want to set up and activate your local python environment:
uv venv
source .venv/bin/activate
How dstack Handles Backends
At its core, dstack backends consist of two main stages:
-
Provisioning: creating the infrastructure where your workload will run.
-
Execution: running your code, typically inside a container or as a script.
Custom backends typically define:
-
Images / VM specs (e.g., instance type, OS image).
-
Startup scripts to prepare the machine.
-
Run commands to execute jobs once provisioned.
dstack expects this configuration in either YAML files or Python scripts, depending on complexity.
What is CloudRift?
CloudRift is a GPU-as-a-service platform that allows API- or CLI-driven provisioning of GPU servers. With CloudRift, you can:
-
Request servers with GPUs like RTX 4090, RTX 5090, RTX 6000 PRO or H100s.
-
Access machines via SSH or docker.
-
Automate instance lifecycle management via API.
For our custom backend, we’ll leverage CloudRift’s API to spin up servers and prepare them for job execution.
Writing the CloudRift Backend
Here’s the fun part: connecting dstack to CloudRift.
At a high level, you’ll:
- Define provisioning logic that:
-
Authenticates with CloudRift.
-
Requests an instance with the desired specs.
-
Runs a startup script to configure Docker, install dependencies, etc.
- Define execution logic that:
-
Runs your workload using Docker or direct commands.
-
Collects outputs and logs.
All the steps necessary to integrate a new backend are described in BACKENDS.md.
There is a small utility that you can use to generate all necessary files:
uv run scripts/add_backend.py -n CloudRift
Generally you need to add your custom code to only two files: configurator.py and compute.py.
In configurator.py you verify a configuration of your backend. The bare minimum is checking API key provided by the user:
def validate_config(
    self, config: CloudRiftBackendConfigWithCreds, default_creds_enabled: bool
):
    self._validate_creds(config.creds)

def _validate_creds(self, creds: AnyCloudRiftCreds):
    if not isinstance(creds, CloudRiftCreds):
        raise_invalid_credentials_error(fields=[["creds"]])
    # Create a http API wrapper
    client = RiftClient(creds.api_key)
    if not client.validate_api_key():
        raise_invalid_credentials_error(fields=[["creds", "api_key"]])
CloudRift, like other backends, use simple HTTP client class (RiftClient), that wraps all API calls necessary to create and terminate VM instance.
In compute.py you implement create_instance and terminate_instance methods:
def create_instance(
    self,
    instance_offer: InstanceOfferWithAvailability,
    instance_config: InstanceConfiguration,
    placement_group: Optional[PlacementGroup],
) -> JobProvisioningData:
    # get dstack commands - they will be added to our cloud-init config
    commands = get_shim_commands(authorized_keys=instance_config.get_public_keys())
    startup_script = " ".join([" && ".join(commands)])
    logger.debug(
        f"Creating instance for offer {instance_offer.instance.name} in region {instance_offer.region} with commands: {startup_script}"
    )

    instance_ids = self.client.deploy_instance(
        instance_type=instance_offer.instance.name,
        region=instance_offer.region,
        ssh_keys=instance_config.get_public_keys(),
        cmd=startup_script,
    )

    if len(instance_ids) == 0:
        raise ComputeError(
            f"Failed to create instance for offer {instance_offer.instance.name} in region {instance_offer.region}."
        )

    return JobProvisioningData(
        backend=instance_offer.backend,
        instance_type=instance_offer.instance,
        instance_id=instance_ids[0],
        hostname=None,
        internal_ip=None,
        region=instance_offer.region,
        price=instance_offer.price,
        username="riftuser",
        ssh_port=22,
        dockerized=True,
        ssh_proxy=None,
        backend_data=None,
    )

def terminate_instance(
    self, instance_id: str, region: str, backend_data: Optional[str] = None
):
    terminated = self.client.terminate_instance(instance_id=instance_id)
    if not terminated:
        raise ComputeError(f"Failed to terminate instance {instance_id} in region {region}.")
During deployment we have to use commands provided by dstack to initialize small web server that will be responsible for communication between an instance and dstack server.
Additional method that can be used if ip address is not known before instance creation is **update_provisioning_data **, where we can check if instance is ready and get its ip address:
def update_provisioning_data(
    self,
    provisioning_data: JobProvisioningData,
    project_ssh_public_key: str,
    project_ssh_private_key: str,
):
    instance_info = self.client.get_instance_by_id(provisioning_data.instance_id)

    if not instance_info:
        return

    instance_mode = instance_info.get("node_mode", "")

    if not instance_mode or instance_mode != "VirtualMachine":
        return

    vms = instance_info.get("virtual_machines", [])
    if len(vms) == 0:
        return

    # check if deployment is completed
    vm_ready = vms[0].get("ready", False)
    if vm_ready:
        # retrieve instance's ip address
        provisioning_data.hostname = instance_info.get("host_address", None)
Running Your First Job
Add your backend to the config file (~/.dstack/server/config.yml):
projects:
  - name: main
    backends:
      - type: cloudrift
        creds:
          type: api_key
          api_key: rift_qRXyeaPDhmCLWIjzhLZQyFfDJn3TzRrzkyieNNIrMb8EyFKAEvMaNlES9x9
encryption:
  keys: []
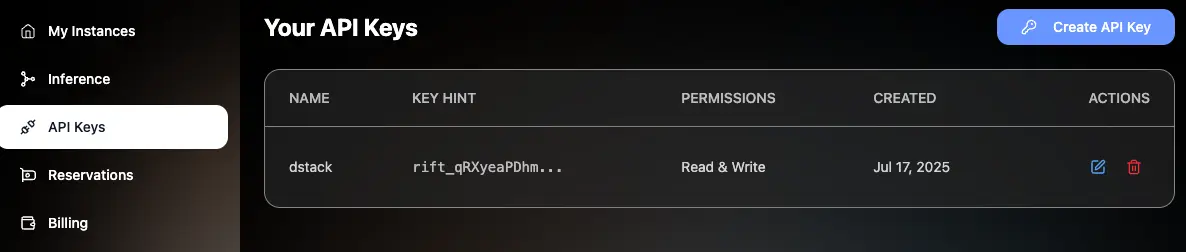
You can create a new API key in CloudRift’s console:
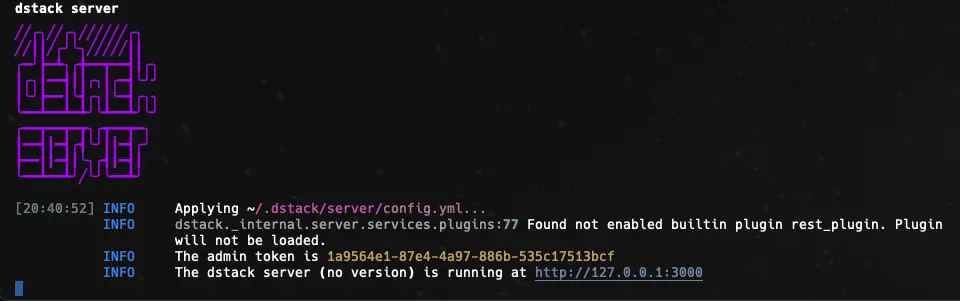
Run dstack in server mode:
uv run dstack server
It should output your admin token and address where you can find web UI to monitor dstack activity.
Then you can run simple example that will create dev-environment:
uv run dstack apply --no-repo -f examples/.dstack.yml
If everything works, then you should see output like this:

To make provisioning faster, you can create a fleet of instances that can be reused to run new jobs. Create a configuration script like this:
type: fleet
# The name is optional, if not specified, generated randomly
name: my-fleet

# Specify the number of instances
nodes: 2
# Uncomment to ensure instances are inter-connected
#placement: cluster

resources:
  gpu: 24GB

idle_duration: off
And apply it with:
uv run dstack apply -f fleet.config.yml
There are multiple examples in dstack repository to play with. For example to run DeepSeek R1 using vLLM library:
uv run dstack apply --no-repo -f ./examples/llms/deepseek/vllm/nvidia/.dstack.yml
It should give following output:
INFO 07-18 20:02:55 [api_server.py:1457] Starting vLLM API server 0 on http://127.0.0.1:3000/proxy/services/main/deepseek-r1-nvidia/
INFO 07-18 20:02:55 [launcher.py:29] Available routes are:
INFO 07-18 20:02:55 [launcher.py:37] Route: /openapi.json, Methods: HEAD, GET
INFO 07-18 20:02:55 [launcher.py:37] Route: /docs, Methods: HEAD, GET
INFO 07-18 20:02:55 [launcher.py:37] Route: /docs/oauth2-redirect, Methods: HEAD, GET
INFO 07-18 20:02:55 [launcher.py:37] Route: /redoc, Methods: HEAD, GET
INFO 07-18 20:02:55 [launcher.py:37] Route: /health, Methods: GET
INFO 07-18 20:02:55 [launcher.py:37] Route: /load, Methods: GET
INFO 07-18 20:02:55 [launcher.py:37] Route: /ping, Methods: POST
INFO 07-18 20:02:55 [launcher.py:37] Route: /ping, Methods: GET
INFO 07-18 20:02:55 [launcher.py:37] Route: /tokenize, Methods: POST
INFO 07-18 20:02:55 [launcher.py:37] Route: /detokenize, Methods: POST
INFO 07-18 20:02:55 [launcher.py:37] Route: /v1/models, Methods: GET
INFO 07-18 20:02:55 [launcher.py:37] Route: /version, Methods: GET
INFO 07-18 20:02:55 [launcher.py:37] Route: /v1/chat/completions, Methods: POST
INFO 07-18 20:02:55 [launcher.py:37] Route: /v1/completions, Methods: POST
INFO 07-18 20:02:55 [launcher.py:37] Route: /v1/embeddings, Methods: POST
INFO 07-18 20:02:55 [launcher.py:37] Route: /pooling, Methods: POST
INFO 07-18 20:02:55 [launcher.py:37] Route: /classify, Methods: POST
INFO 07-18 20:02:55 [launcher.py:37] Route: /score, Methods: POST
INFO 07-18 20:02:55 [launcher.py:37] Route: /v1/score, Methods: POST
INFO 07-18 20:02:55 [launcher.py:37] Route: /v1/audio/transcriptions, Methods: POST
INFO 07-18 20:02:55 [launcher.py:37] Route: /v1/audio/translations, Methods: POST
INFO 07-18 20:02:55 [launcher.py:37] Route: /rerank, Methods: POST
INFO 07-18 20:02:55 [launcher.py:37] Route: /v1/rerank, Methods: POST
INFO 07-18 20:02:55 [launcher.py:37] Route: /v2/rerank, Methods: POST
INFO 07-18 20:02:55 [launcher.py:37] Route: /invocations, Methods: POST
INFO 07-18 20:02:55 [launcher.py:37] Route: /metrics, Methods: GET
INFO:     Started server process [618]
INFO:     Waiting for application startup.
INFO:     Application startup complete.
Then you can query it using local proxy.
Use dstack token printed when starting dstack server and create query like this to list available models:
curl http://127.0.0.1:3000/proxy/models/main/models \
    -X GET \
    -H 'Authorization: Bearer 1a9564e1-87e4-4a97-886b-535c17513bcf' \
    -H 'Content-Type: application/json'
Similarly you can ask for completion:
curl http://127.0.0.1:3000/proxy/models/main/chat/completions \
    -X POST \
    -H 'Authorization: Bearer 1a9564e1-87e4-4a97-886b-535c17513bcf' \
    -H 'Content-Type: application/json' \
    -d '{
      "model": "deepseek-ai/DeepSeek-R1-Distill-Llama-8B",
      "messages": [
        {
          "role": "system",
          "content": "You are a helpful assistant."
        },
        {
          "role": "user",
          "content": "What is Deep Learning?"
        }
      ],
      "max_tokens": 128
    }'
More examples can be found at GitHub.
Troubleshooting and Tips
Integrating a custom backend can expose subtle issues:
-
Ensure your CloudRift startup scripts correctly install dependencies.
-
Verify SSH or Docker access during provisioning.
-
Use dstack's logging options to debug failures in provisioning vs execution.
I recommend starting with a minimal startup script and a simple job to validate your backend before scaling up.
To get more detailed information about errors use:
uv run dstack ps -v
uv run dstack logs vscode --diagnose
Or run dstack with more verbose log level:
uv run dstack server -l debug
Your ssh key generated by dstack can be found in sqlite DB at ~/.dstack/server/data/sqlite.db. You can use following query:
sqlite3 ~/.dstack/server/data/sqlite.db "SELECT ssh_public_key FROM projects WHERE name = 'main'"
Additional information can be found in worker’s log on VM’s instance at*/root/.dstack/shim.log.
Conclusion
Adding a new backend to dstack is fairly easy process and it allows you to gain full control over how and where my workloads run, while keeping the simplicity of dstack’s orchestration.


