How to Rent a GPU-Enabled Machine for AI Development

With CloudRift GPU-as-a-service platform
I am a PC enthusiast and use it as much as possible. However, with the speed at which AI models are growing in size, it is challenging to avoid the cloud for AI development.
This tutorial explains how to rent a GPU-enabled machine and configure a development environment with CloudRift using Jupyter Lab or VS Code. Whether you need an RTX 4090 for deep learning or an RTX 5090 for advanced AI development, this guide will help you get started.
No GPU amount is enough to satisfy rapidly growing AI models
Register
CloudRift has multiple GPU data centers on the platform. For this tutorial, we will use NeuralRack, a low-cost GPU rental service suitable for individual developers.
To rent a machine, go to https://www.neuralrack.ai/console and create an account by clicking the "Sign Up" button.

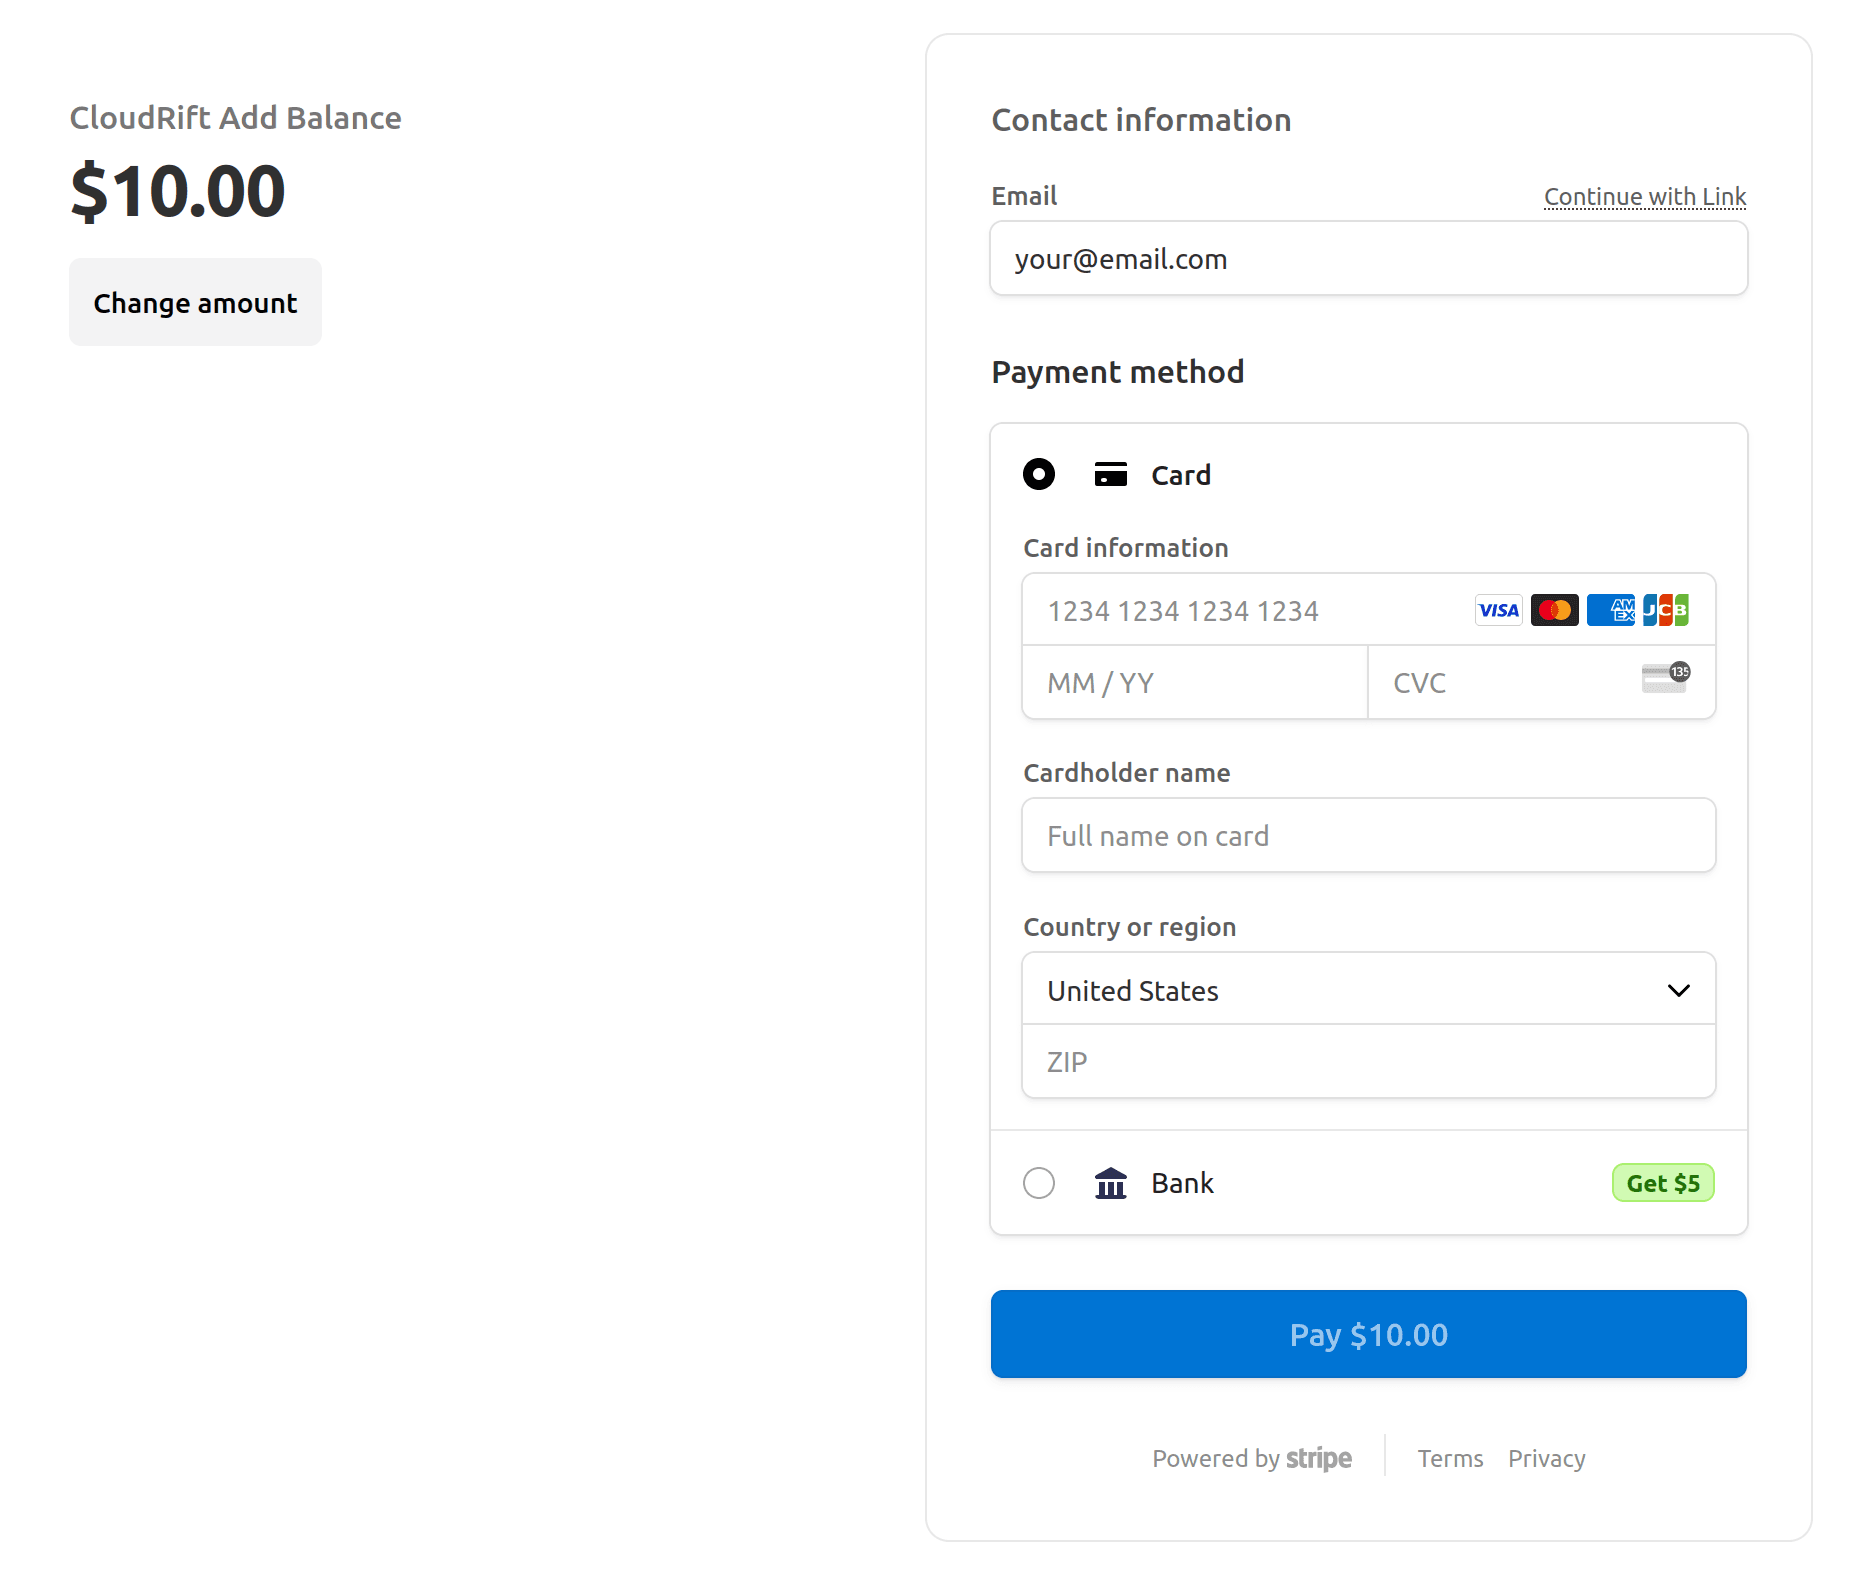
Select the billing tab and click "Add Credit".

Use the Stripe payment interface to add balance to your account using one of the available methods. $10 is enough to start.
On the "My Instances" page, click "New" to rent a new instance.
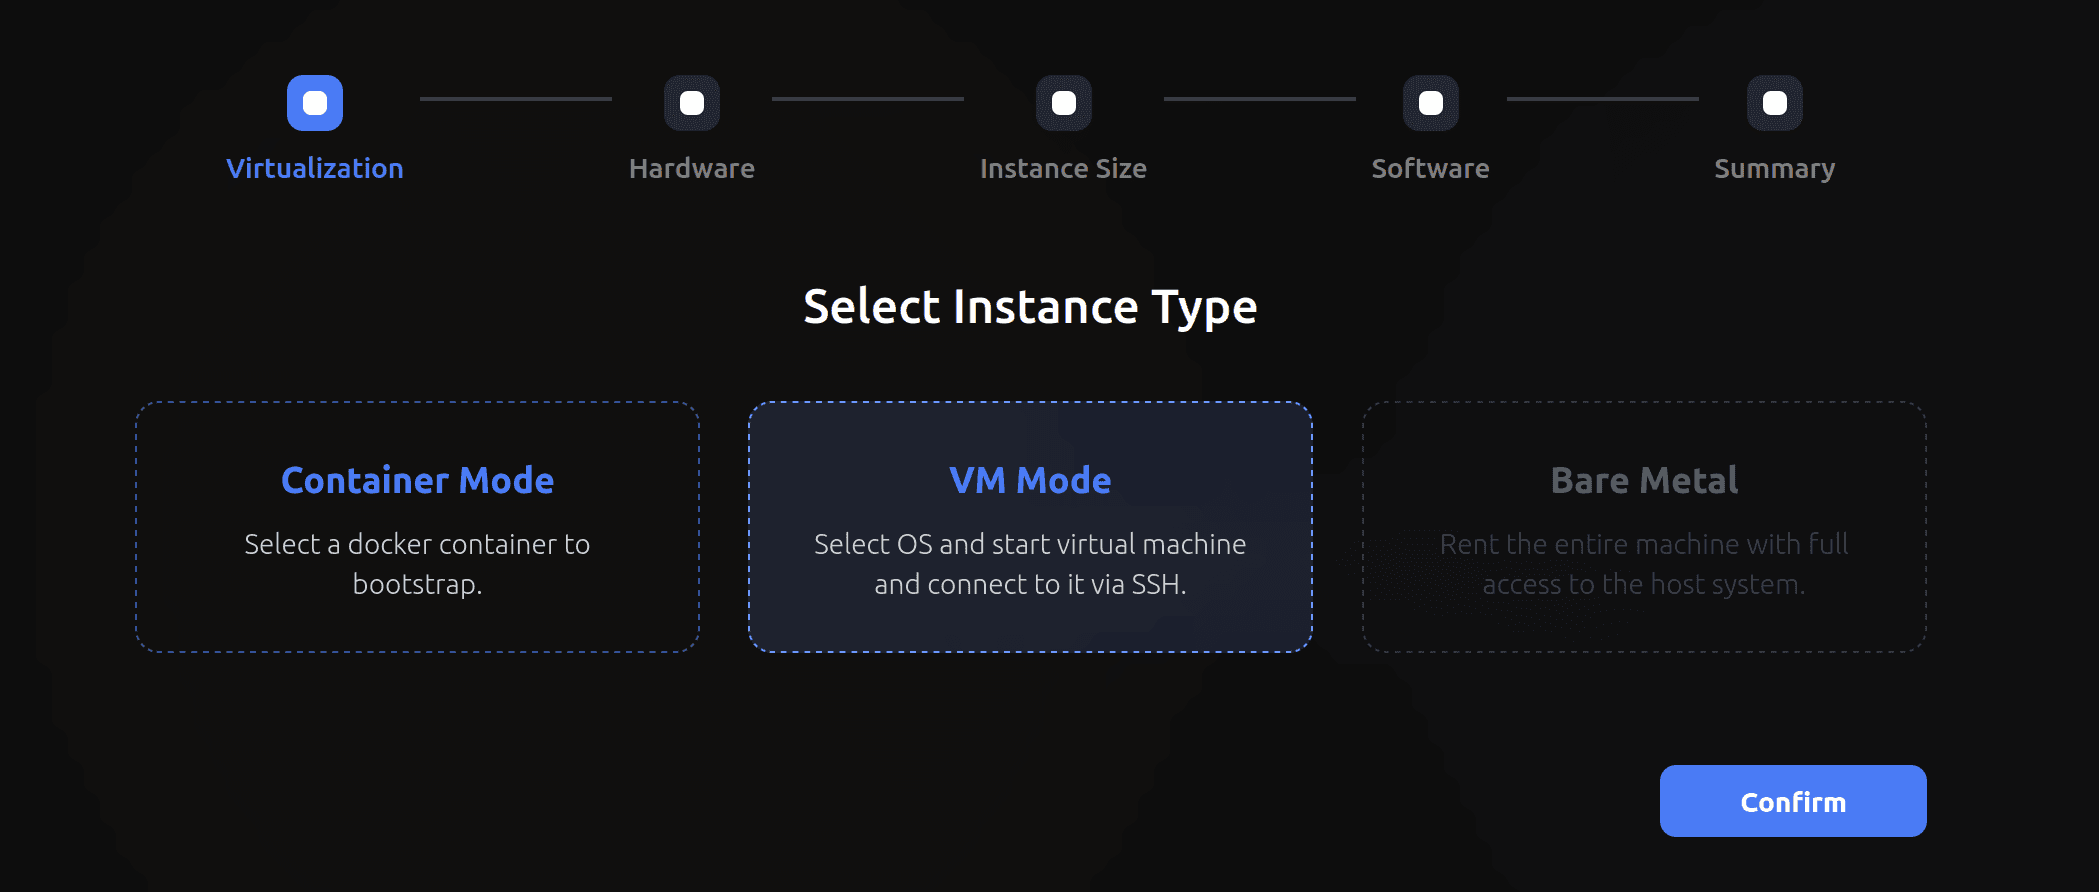
Configuring Virtual Machine
Consider two modes when renting a server for development: Container and Virtual Machine. Virtual Machines give the most flexibility and are generally easier to work with. However, they take longer to start, and you cannot benefit from our simple recipes for configuring the development environment. You'll need to configure it yourself, as we explain below.
To rent a Virtual Machine, select "VM Mode" after clicking the "New" button on the "My Instances" page.
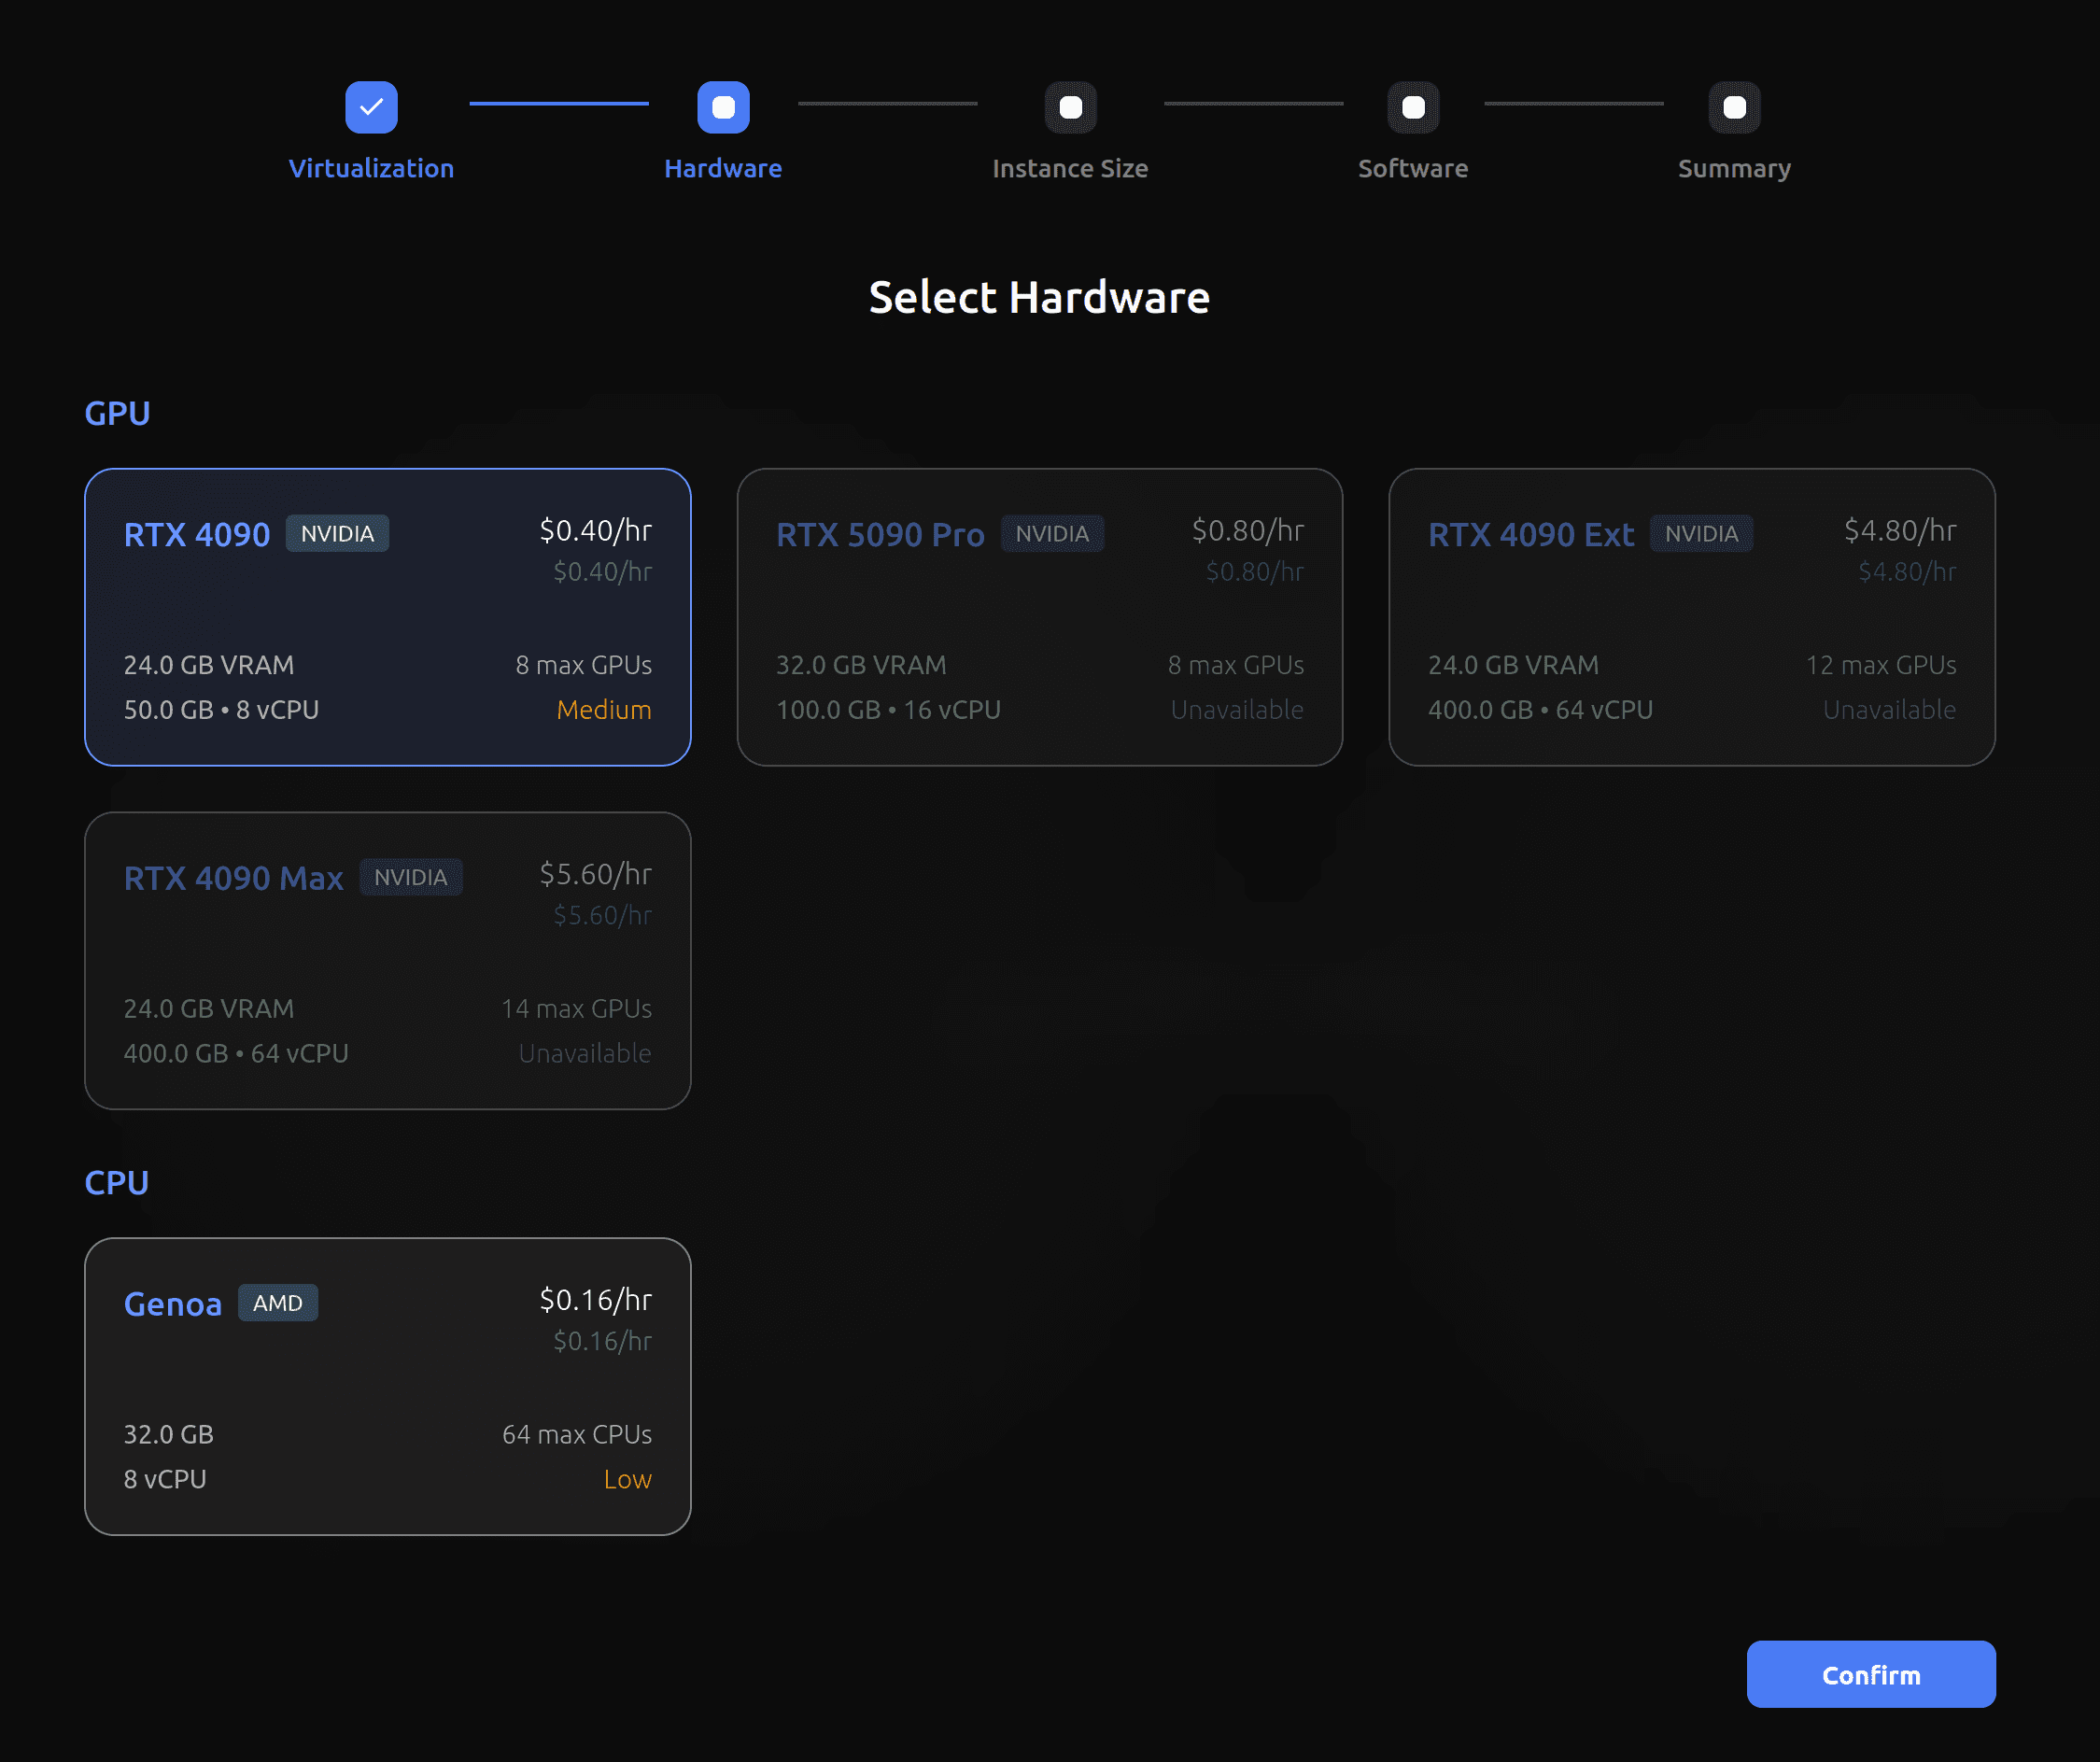
Choose the machine that you want to rent.
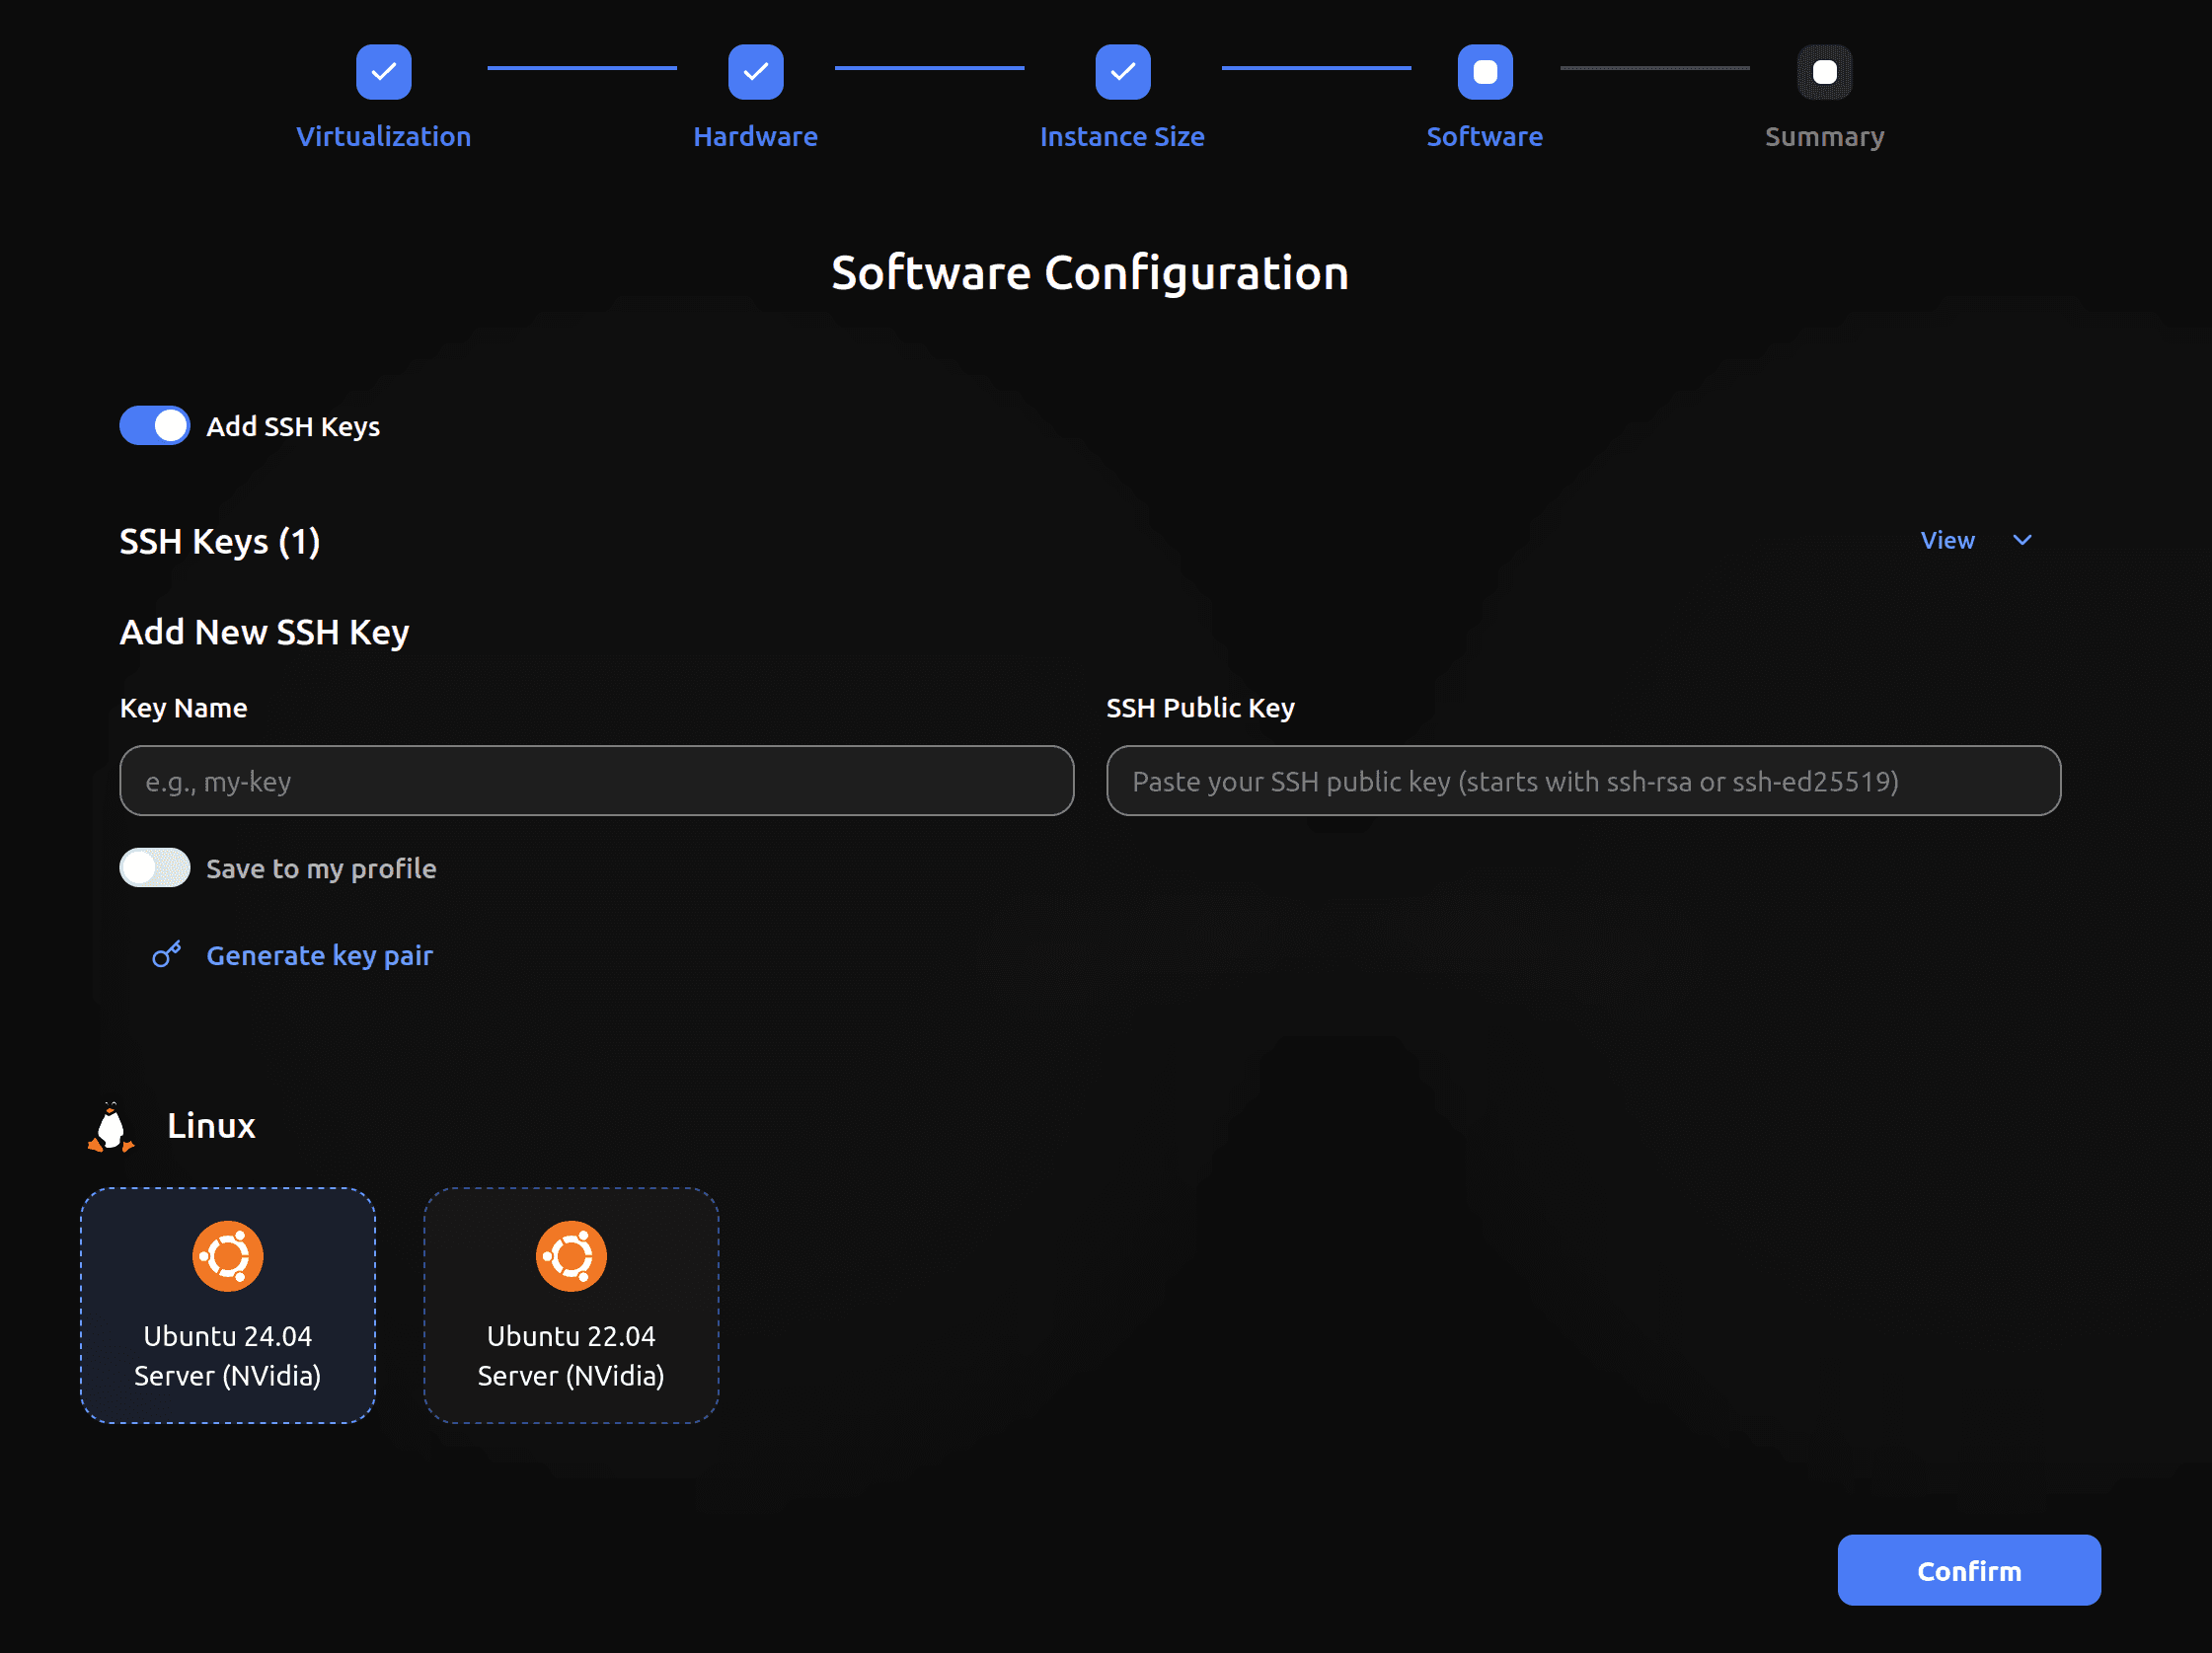
On the software configuration screen, choose how to access the machine. Using an SSH key for authentication is more convenient and secure. If you're not familiar with SSH, disable the "Add SSH Key" option, and a password will be generated that you can use to log in instead.
You will see an instance in the dashboard. GPU machines typically take about a minute to provision, while CPU-only machines are faster. Click the Connect button.
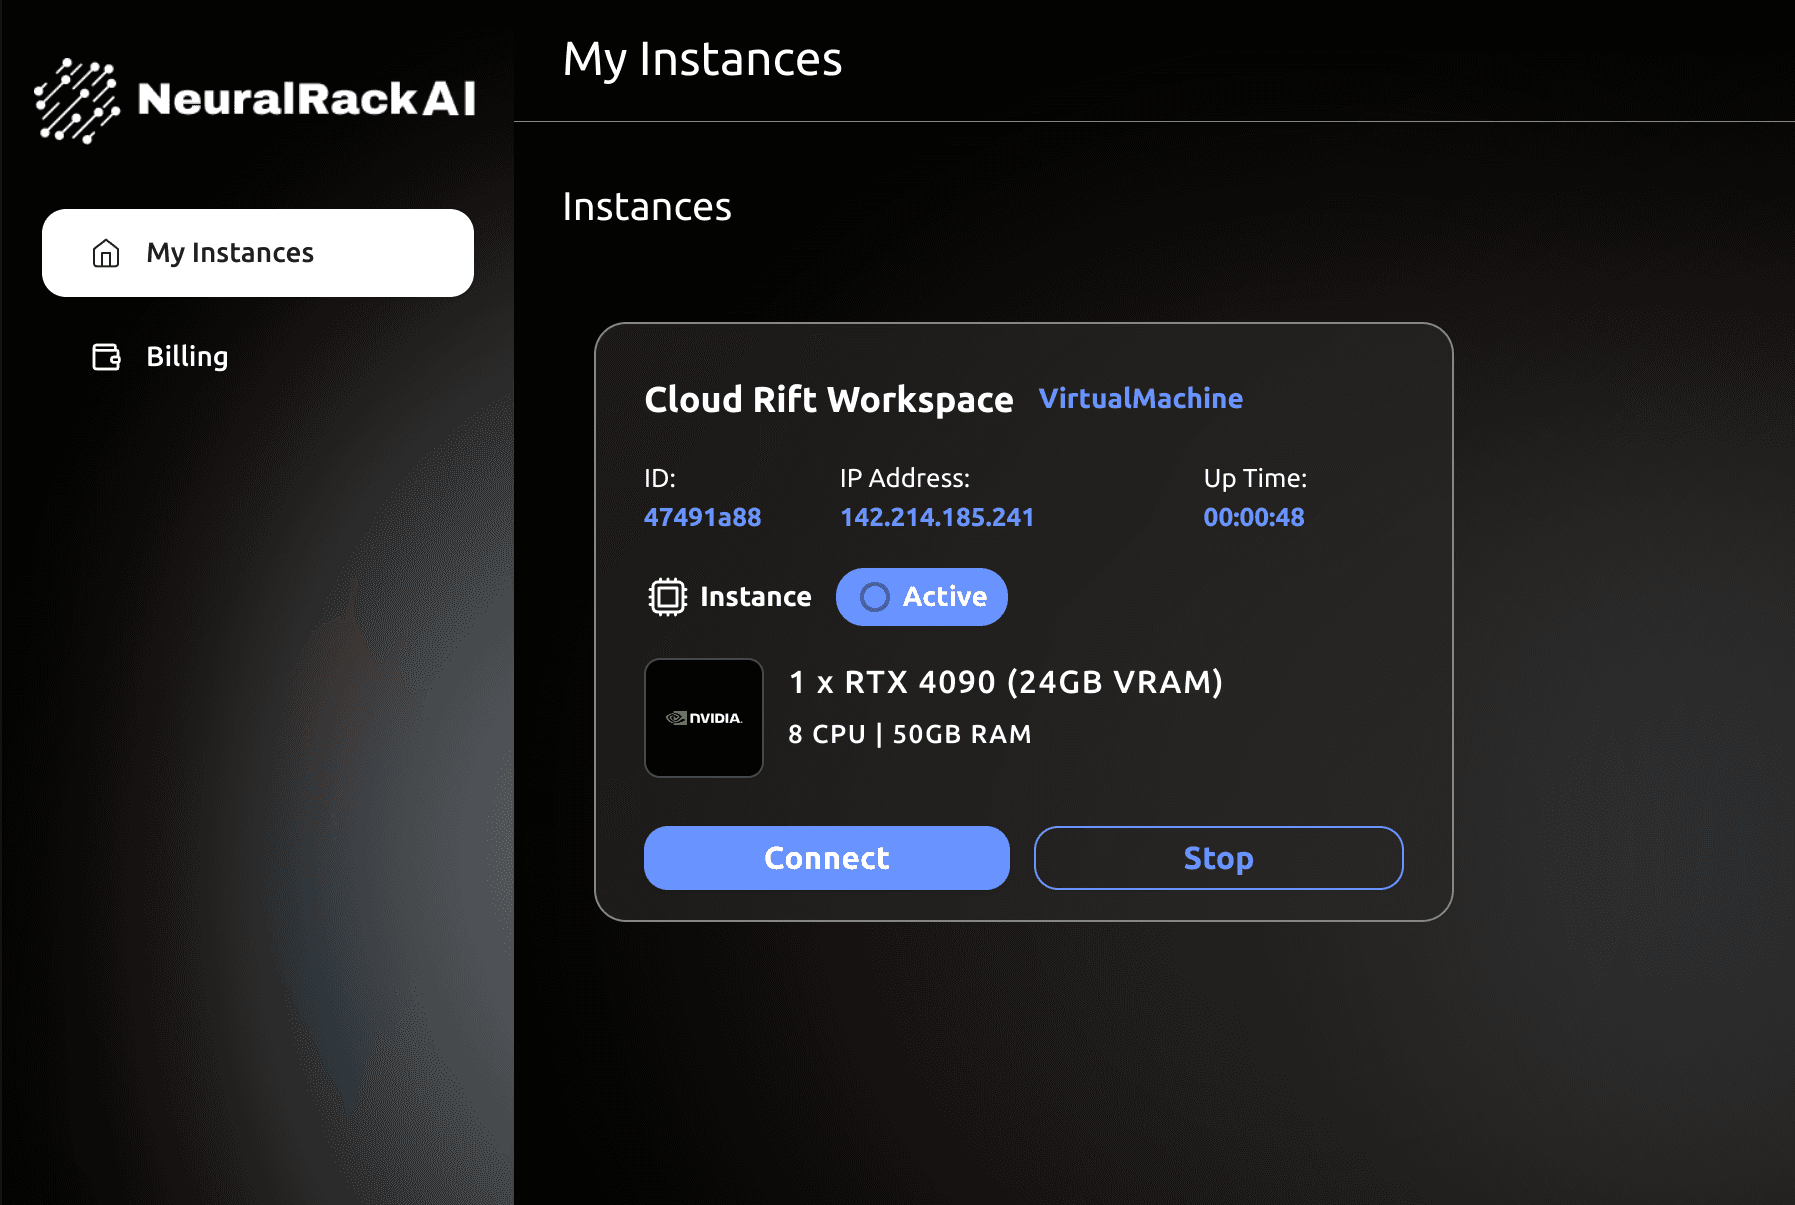
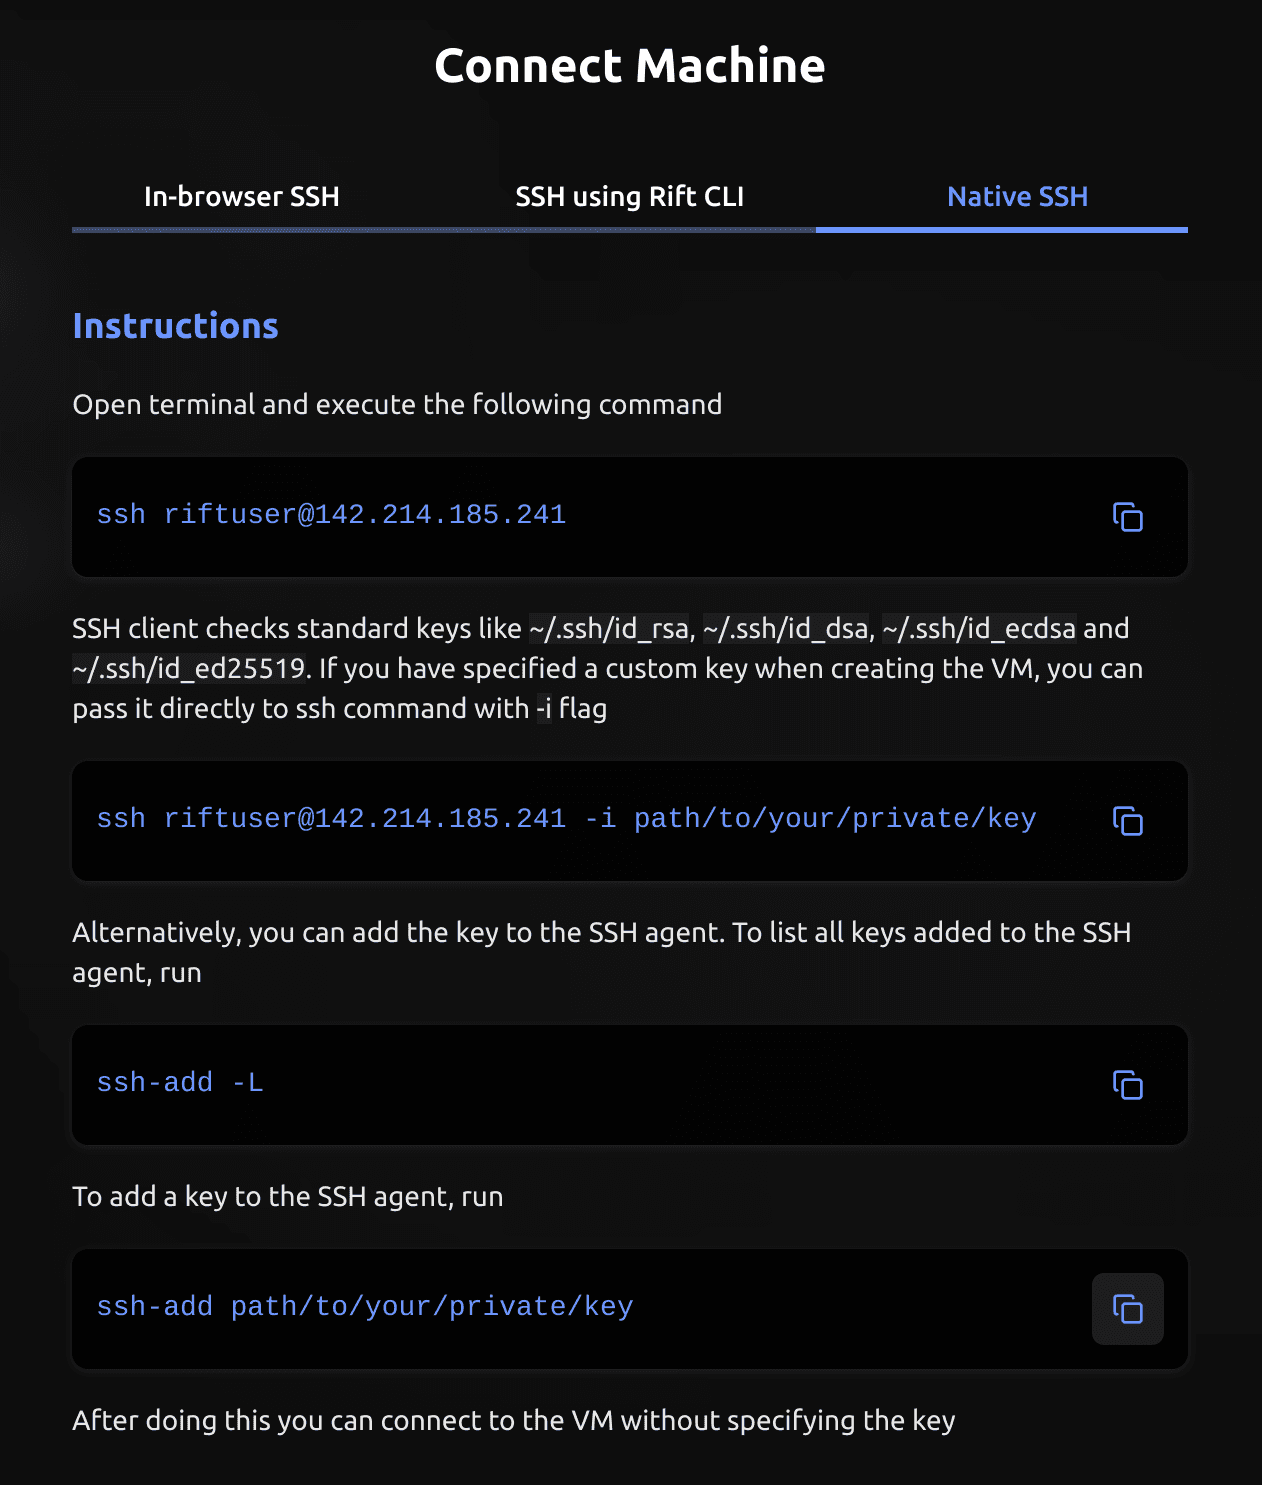
Follow the instructions to connect to a newly provisioned instance.
Start Jupyter Lab
Jupyter Lab is the simplest IDE for Python development. It contains everything needed for short experiments: a file explorer, a command line, and the Jupyter Notebook.
Install the necessary system dependencies after starting a VM and connecting to it.
sudo apt update
sudo apt install python3-venv
Create a virtual environment.
python3 -m venv venv
source venv/bin/activate
Install Jupyter Lab and start it. Replace JUPYTER_TOKEN with your secret.
pip install jupyterlab
JUPYTER_TOKEN=ide-tutorial jupyter lab --no-browser --port=8080 --ip=0.0.0.0
You need to add the --ip=0.0.0.0 flag to be able to access the notebook on a remote server externally since, by default, all access outside is disabled. The IDE will be available at http://{node-ip-address}:8080/. You can find the IP address of the instance in the console. Specify JUPYTER_TOKEN when prompted to log in.
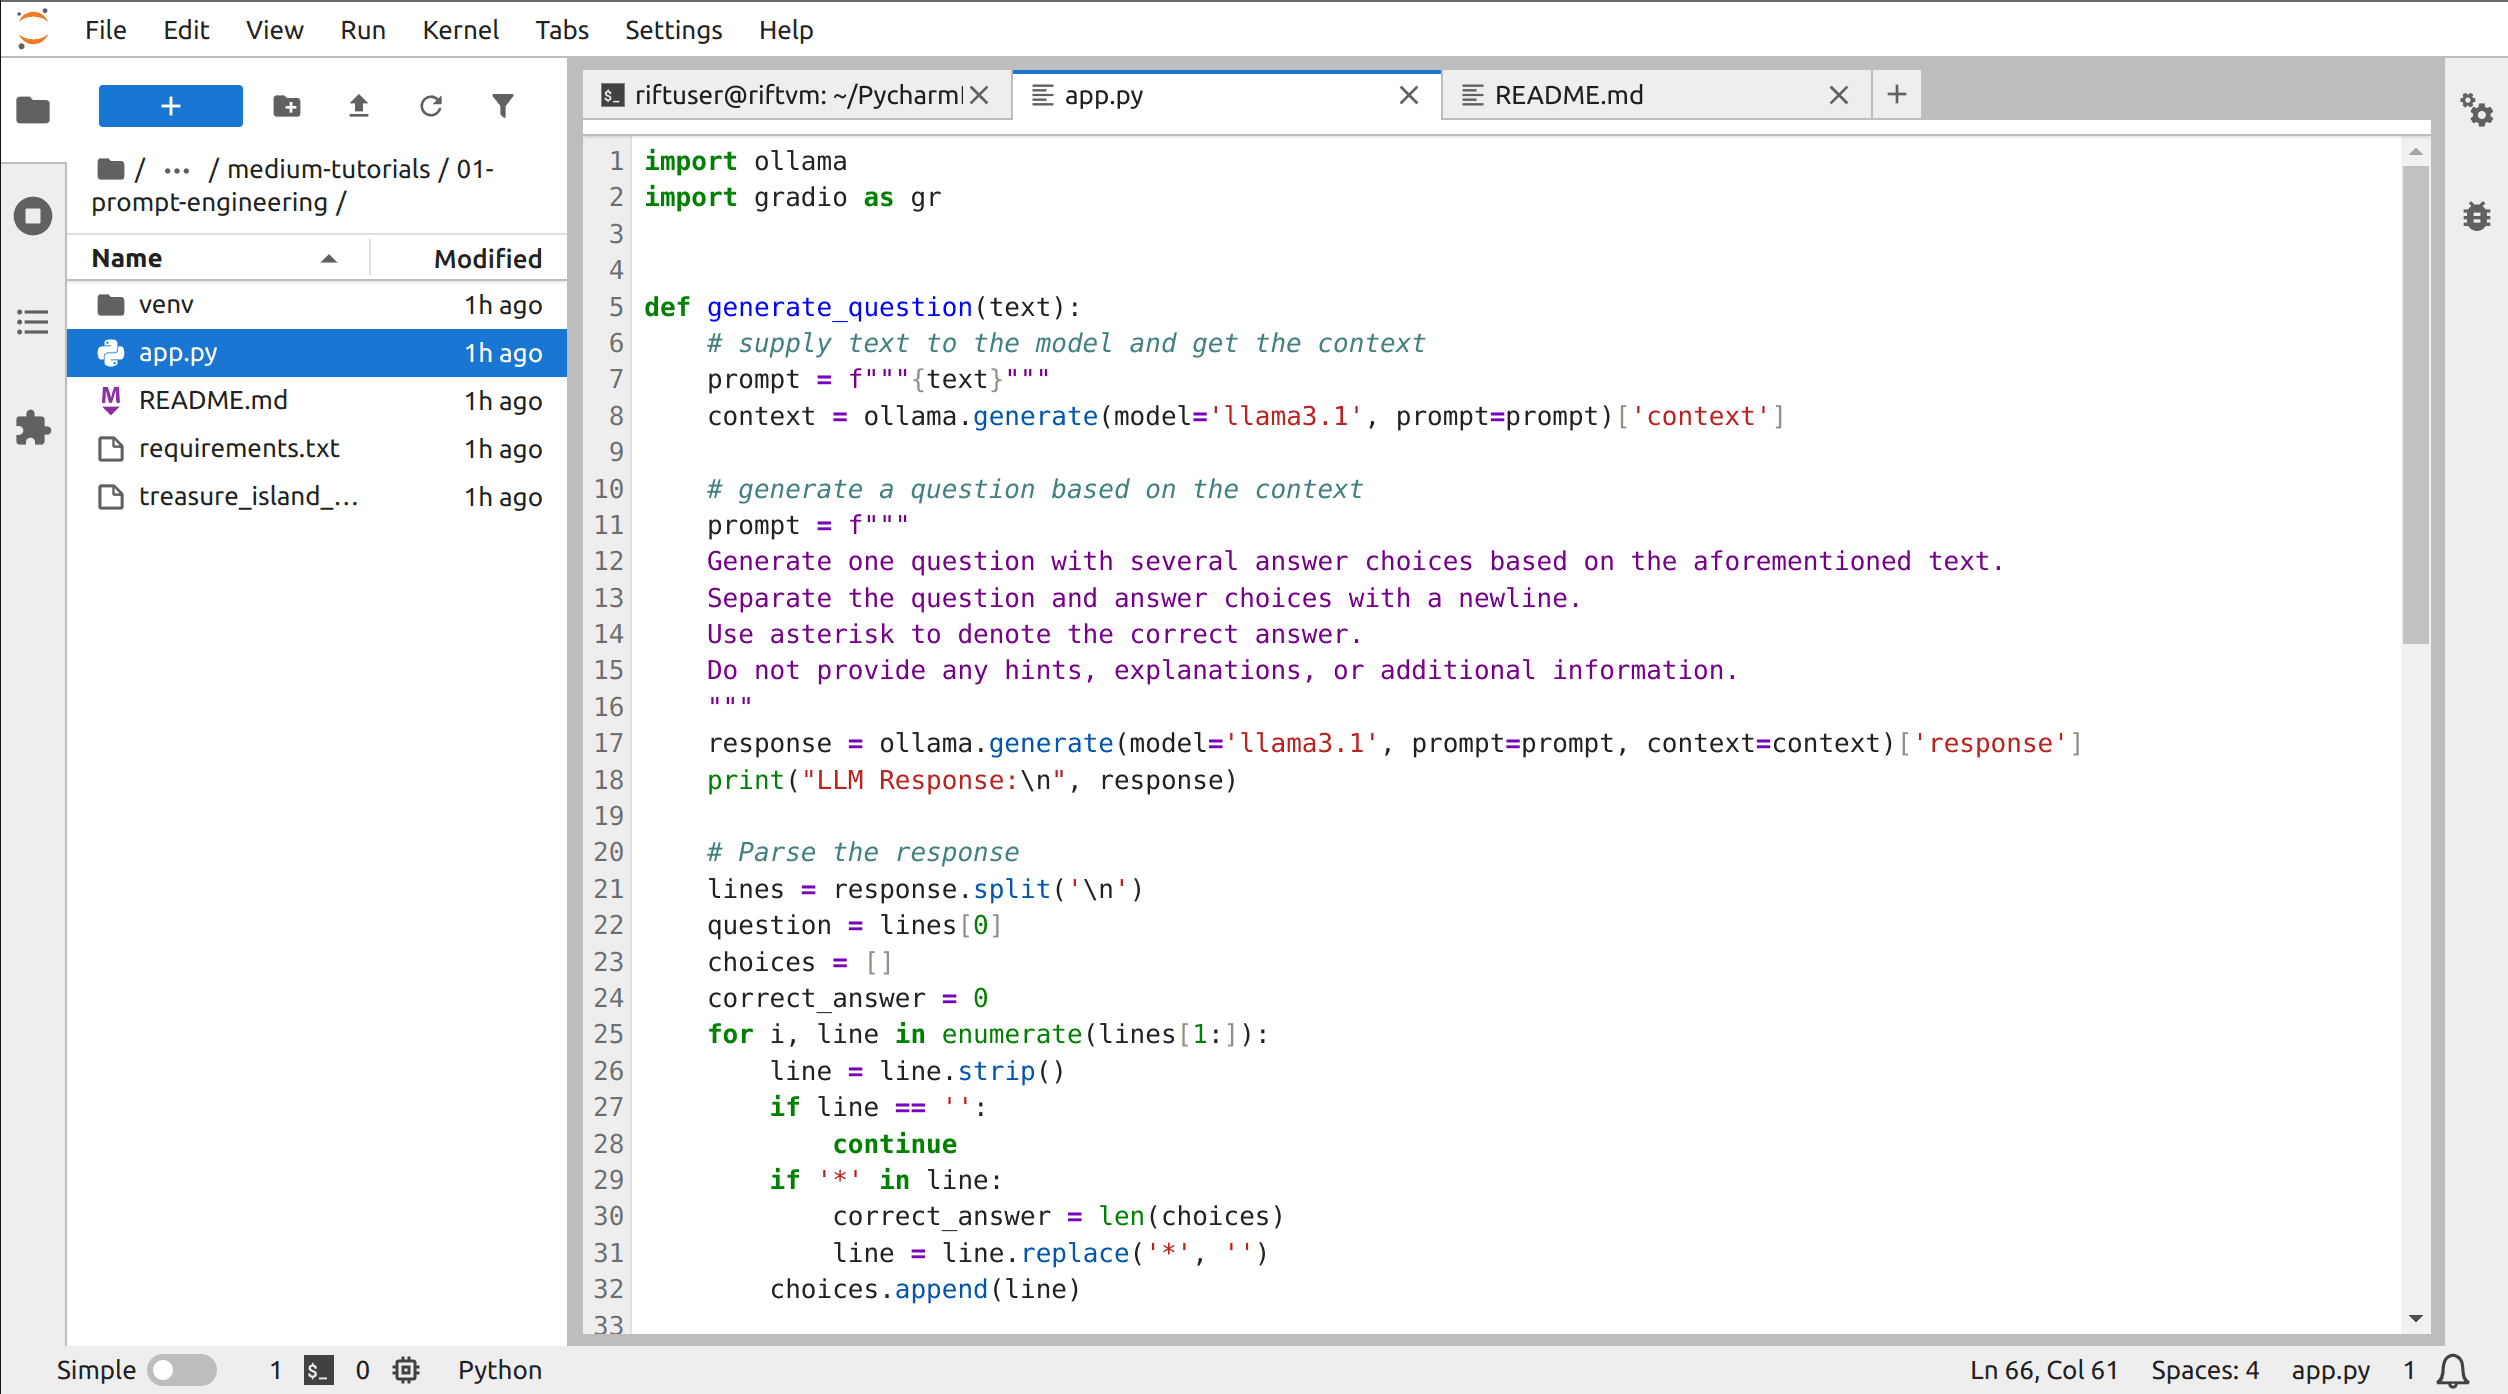
Jupyter Lab hosted on neuralrack.ai
Start VS Code
VS Code is convenient if you need to do more serious development work. It contains a debugger. It supports many languages. The command line and file explorer are also available, along with a gazillion features you probably won't need.
Install the code-server on a remote machine and run it using the following command.
curl -fsSL https://code-server.dev/install.sh | sh
PASSWORD=ide-tutorial code-server --bind-addr 0.0.0.0:8080
Don't forget to substitute the password with your desired password. The IDE will be available at http://{node-ip-address}:8080/. You can find the IP address of the instance in the console.
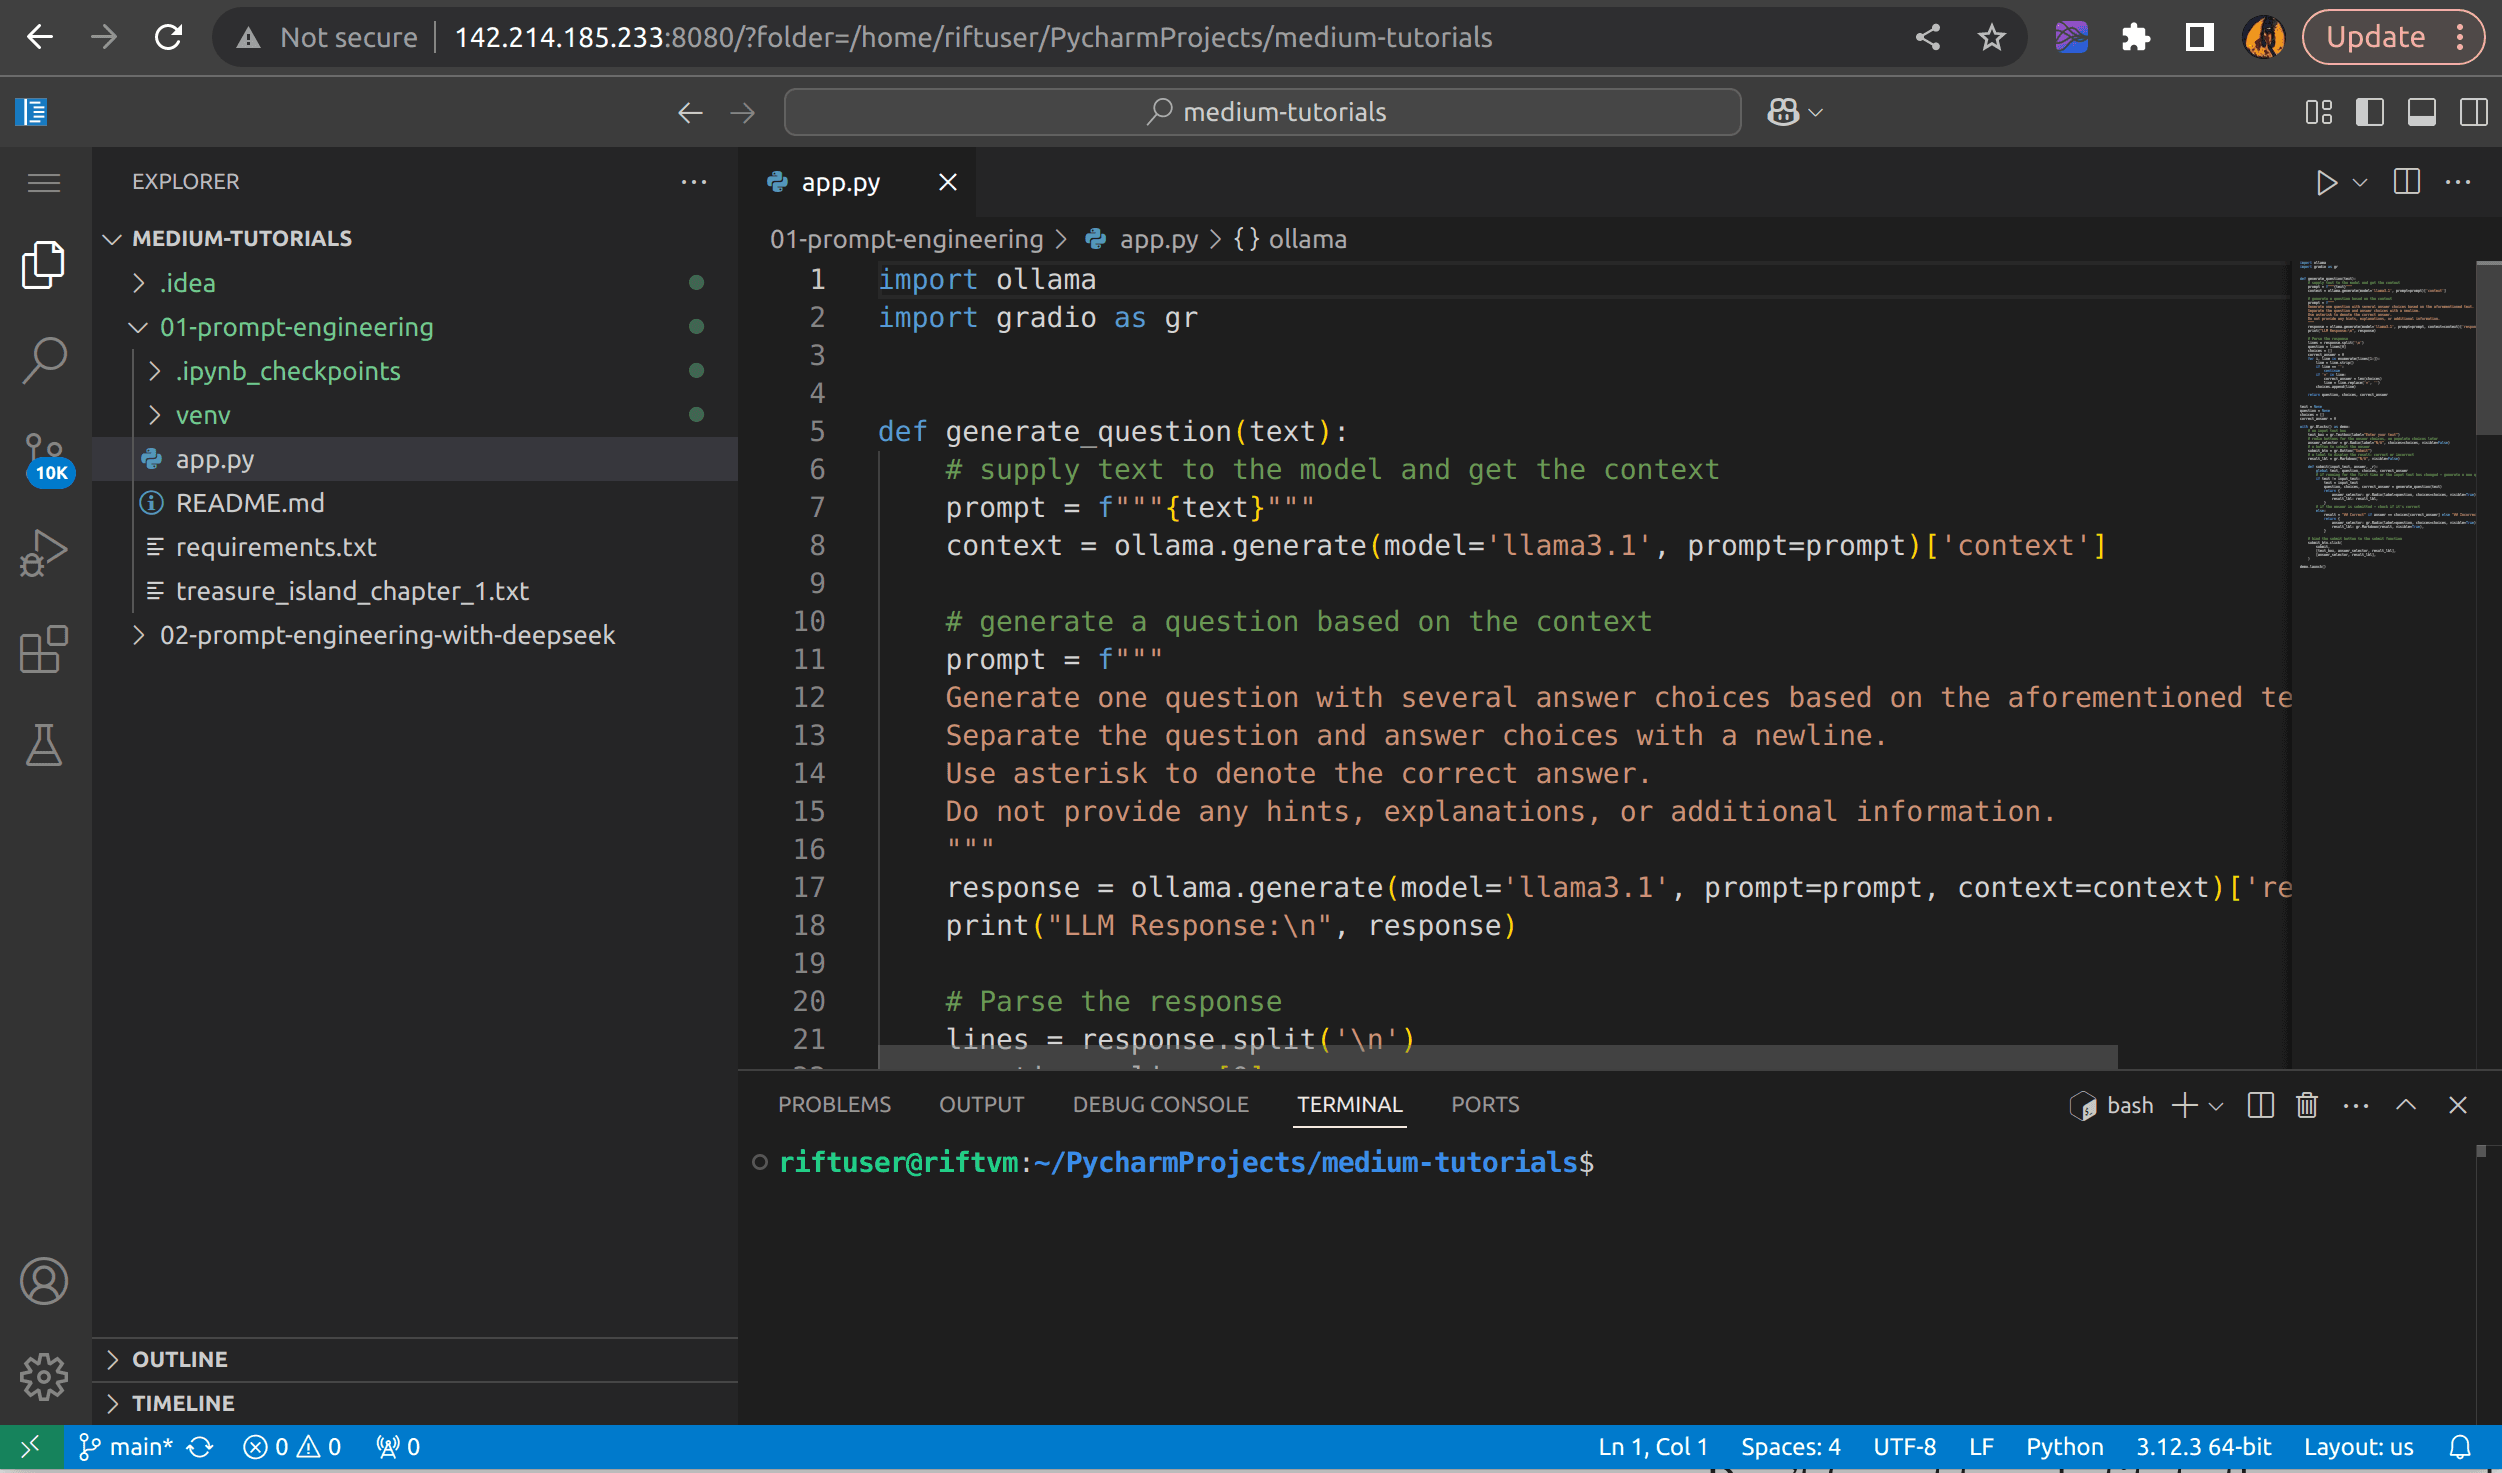
VS Code hosted on neuralrack.ai via code-server


